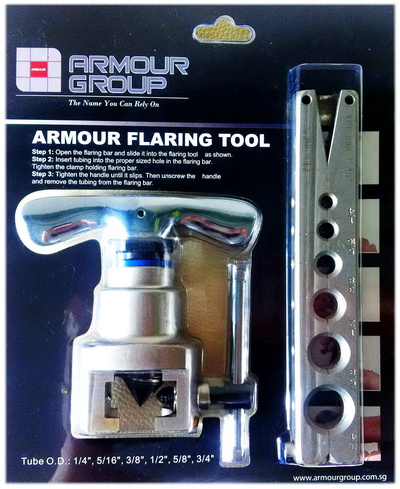

Flaring Tool
Armour Eccentric Flaring Tool are constructed from forged high quality steel and features a clutch to prevent over tightening and thinning of flare wall. The tool lets you create a 45 degree on both aluminium and copper tubing, hard drawn and soft drawn. Armour Flaring Tool is also a sure bet with its self centering, non-slip tubing and hardened flare.
Features
Made from forged steel: Tough & long lasting Self Centering Mould: Highest Flare Precision Flare cone rotates off-centre in needle bearing: controlled expanding and shaping of tube end without tearing.

Setup
Rotate T handle and cone driving screw counter clockwise to allow
clearance for inserting the clamp bar Position the clamp bar with the
dimples on the T bar side of the yoke assembly and insert into the yoke.
Flaring Instructions
Rotate T handle and cone driving screw counter clockwise to allow
clearance for inserting the clamp bar Position the clamp bar with the
dimples on the T bar side of the yoke assembly and insert into the yoke.
Make sure that the tubing is cut clean and eburred Insert end of tubing in the proper size die on the clamping bar. Tube should be approximately even with the top of the lamp bar.
Slide the yoke assembly over the tube and align with the provided markings on clamp.
Tighten the T handle securely to lock the yoke assembly onto the clamp bar. The T bar tip should
engage with the dimple on the clamp bar.
Turn the cone driving screw clockwise until a clicking sound is heard. The flare is now complete.
Turn the cone driving screw counter clockwise until cone lears the tube flare. Loosen the yoke T
handle and slide the yoke assembly towards the end of the clamp bar. Remove flare tube and job is
done.
Make sure that the tubing is cut cut clean and deburred